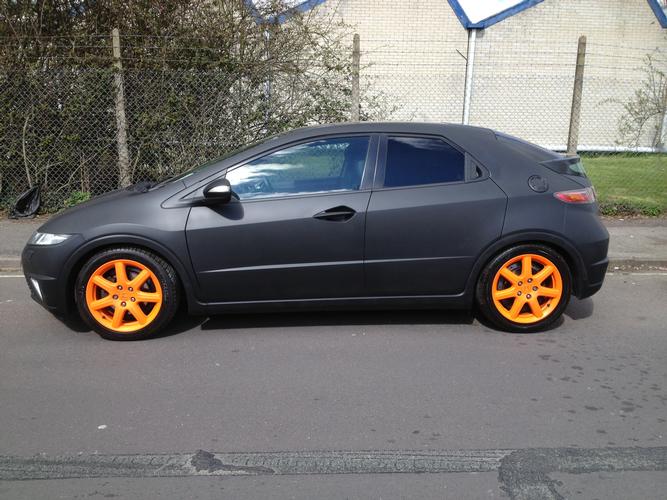
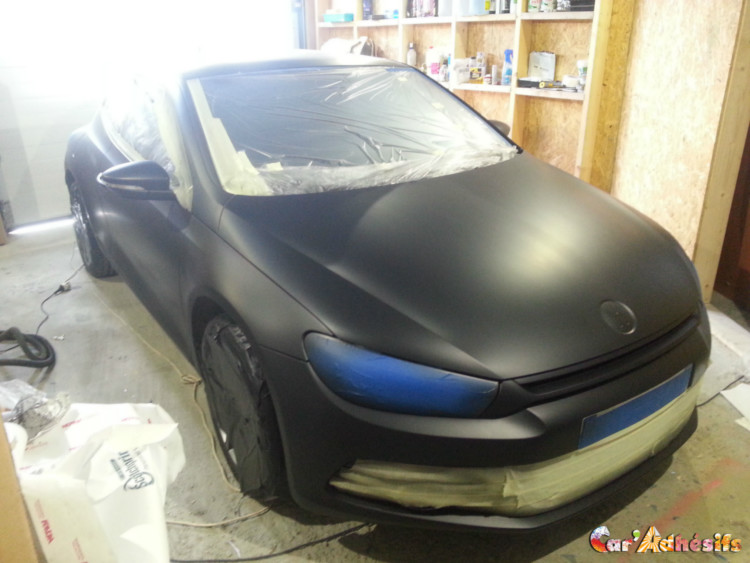
Plasti Dip is the latest trend in vehicle make-overs and is being used by amateurs and professionals alike. With a wide range of effects/finishes available it is possible to create the look that you desire. You can wrap/dip a whole car or use Plasti Dip to accent details on the exterior or interior of your vehicle. It is durable, but you have the option of removing it at a later date without damaging your original paintwork.
For the first-timers out there, here is the lowdown on how to achieve your vehicle make-over without breaking the bank!
The transformation is as easy as this…
Benefits of using Plasti Dip to transform the look of your vehicle
- Protects your original paintwork
- Reduces water ingress
- Covers rust
- Is cost effective
- Suitable for all skill levels
- Can be removed at a later date if required
Tools needed
- Spray Gun – Earlex MS2901 has been specifically designed for use with Plasti Dip or you can use an electric airless sprayer or if using spray cans a spray can handle is a worthwhile purchase
- Approx 5 litres of Plasti Dip and the same quantity of Plasti Dip Thinners for a medium-size car
- Masking tape, cardboard and sheets
- Stanley knife or razor blade
- Dust and dirt free area
Preparation of spraying area
- Cleaning to ensure the work area is free of dust and dirt is very important
- Indoors or outdoors is fine
Be aware that the application of Plasti Dip in a cold environment will slow down the curing process but shouldn’t affect the application.
Preparation of Vehicle
- Completely clean your vehicle paying particular attention to crevices
- A traffic film remover is advisable
- Completely allow your vehicle to dry (or use an air compressor) before commencing spraying
- Mask the windscreen and other areas you don’t want painted to save time later and this saves on product too
- Remember to cover the brakes, wheels, and transmissions, intercooler and radiator to protect them
First Coat
- Apply a light layer first…a “mist coat” with about 50% transparency to aid bonding of the following coats
- Be methodical in your approach, painting panel by panel
- Each coat will take approximately half an hour to dry (weather and temperature permitting)
- 4 to 5 layers will give you the perfect durable finish (whilst allowing easy removal when you decide to peel the Plasti Dip off)
Final stages
- Whilst the Plasti Dip is curing clear the area and clean your equipment thoroughly (flush your spray gun with thinners)
- Test that the Plasti Dip has fully dried/cured by scoring it in an inconspicuous area
- The fun part is removing any unwanted Plasti Dip from areas that you might not have masked e.g. lights, mirrors and door handles…to do this score around them with a Stanley knife or blade, then peel off the unwanted Plasti Dip (very therapeutic)!
- If you have applied enough layers it will peel off easily, but any areas that are too thin to peel off cleanly can be removed using thinners on a lint free cloth
- It is advisable to wait a few days before washing your Plasti Dipped vehicle to allow it to cure fully.
- If you have opted for the matt finish the surface will appear slightly textured.
Other Options

- You can apply an additional topcoat of Glossifier, Metalizer or Pearlizer for a different effect
- For the more adventurous coloured Chameleon or Holographic Flakes can be added to a topcoat of Glossifier or Clear Matt Plasti Dip for a stunning effect that can be as subtle or intense as you choose. Flakes are available in a kaleidoscope of colours.
- The application process for these is as follows;
1) Prepare as normal
2) Apply 3-4 coats of Plastidip Multi Purpose Coating
3) Stir Flakes thoroughly into Glossifier or Clear Matt Plastidip
4) Apply the Flake Mixture, allowing approximately 20 to 30 minutes drying time between layers, until you achieve the desired effect
5) If you wish… Apply a final coat of Glossifier without Flake to achieve a high gloss finish and to protect the Flake coat.
Tips
- In order to prevent clogging use a 1.4mm nozzle size or above with your spray gun
- As a guide only; mix 30 grams Flake per 1 litre of Glossifier/Plasti Dip
- The density of the Flake coat can be altered by increasing the ratio of Chameleon Flake per litre
- Agitate the mixture regularly during the spraying process to ensure the flakes are evenly distributed
- If you require help with your spraying technique there are many tips available on YouTube.
- We would advise that you spray a test piece before embarking on your project to ensure the desired effect is achieved
What are you waiting for!?